What is the Manage Broadcasts Page?
In C4, to view information regarding Broadcasts there were two different locations that you had to check: the Scheduled Broadcast Report for future Broadcasts, and the Broadcast Summary Report for Broadcasts that had already gone out. In order to make it easier to view all Broadcasts that you may be interested in seeing, we have removed these two reports, and created the Manage Broadcasts Page. The Manage Broadcasts Page allows you to see all Broadcasts, whether in the future or Broadcasts that have already been sent.
What does each column mean?
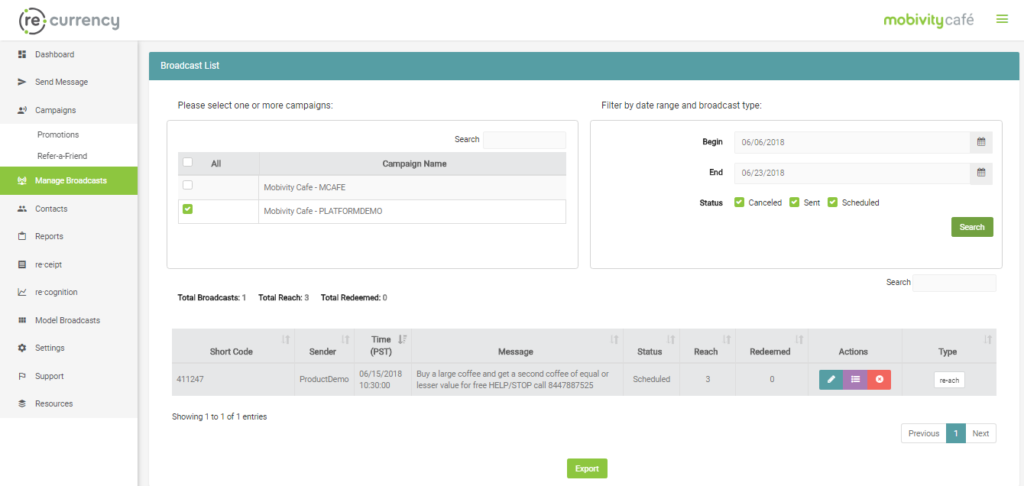
Each column on the Manage Broadcasts Page shows a top level view into the information that is relevant to the Broadcast. Here’s what each column means:
- Short Code: The Short Code column on the Manage Broadcasts page displays the Short Code that the Broadcast will be going out on. More often than not, this is going to be the same across all of your Broadcasts.
- Sender: The Sender column is the Username of the user that scheduled the Broadcast. In the event that more than one user has access to Broadcast to the same Keyword, this will help clarify which user scheduled a Broadcast.
- Time (PST): This is the time that the Broadcast was initially scheduled. The Broadcast is scheduled in PST, which is important to consider when looking at the Manage Broadcasts Page.
- Message: Message refers to the Broadcast Message that was scheduled through the Broadcast flow.
- Reach: The reach of a Broadcast is the estimated number of subscribers that are expected to receive the Broadcast.
- Status: Displays what the current status of a Broadcast is. A detailed breakdown of the available statuses is provided below.
- Actions: The Actions column allows the user to make changes to a Broadcast, or just view a further breakdown of the Broadcast. More information on this can be found below.
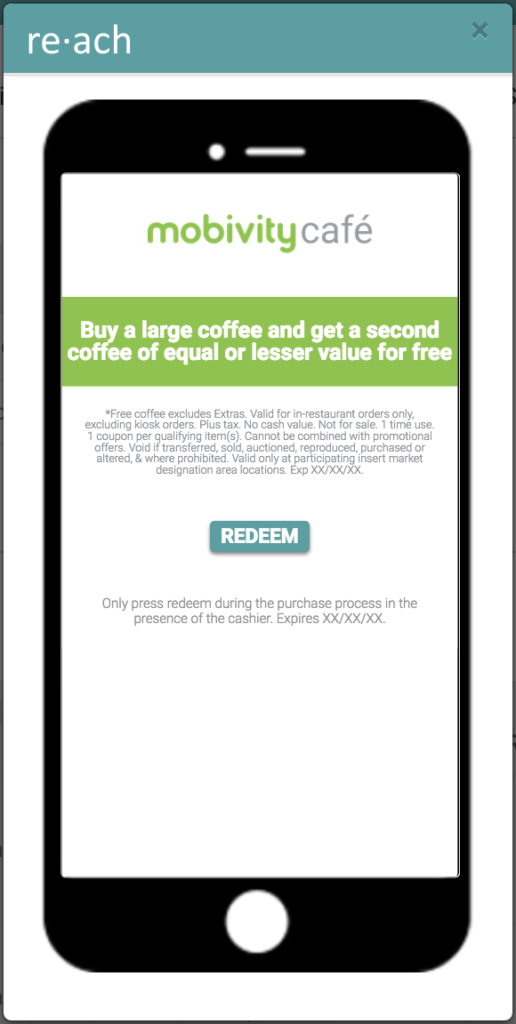
- Type: The Type column displays the type of the Broadcast that is being sent, and also allows the user to view the Coupon that was tied to a Reach broadcast by clicking on the “Reach” Button when it’s available.

Pulling Broadcast Information Using the Manage Broadcasts Page:
- In order to pull information through the Manage Broadcasts Page, there are two pieces of information required: the relevant Campaigns and the Date Range that you are interested in searching for.
- Once you’ve selected at least one Campaign and a valid Date Range, clicking on the “Search” Button will display all Broadcasts scheduled to go out to that Campaign within the Date Range, including the status of the Broadcast.
Available Statuses for a Broadcast:
- Sent: When a Broadcast has successfully been sent to the Subscriber base, it will display on the Manage Broadcasts Page as “Sent”.
- Scheduled: After moving through the Broadcast flow, any message that has not yet been sent will be displayed as “Scheduled” to indicate it has yet to go out.
- Cancelled: In the event that you decide to Cancel a Broadcast, it will still appear on the Manage Broadcasts Page, but it will be displayed as “Cancelled” to indicate that it will not be going out to your subscribers.

What does each Action Button do?
Here is a detailed breakdown of how to use all 3 Action Buttons, and how they can be used to offer the most flexibility for your Broadcasts:

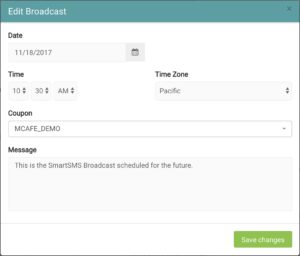
- Edit Broadcast: Fortunately, once a Broadcast has been scheduled, it is not set in stone. Clicking on the Edit Broadcast Button allows you to update the Date and Time a Broadcast is scheduled for, the Reach Coupon that has been attached to the Broadcast, and even the Broadcast Message itself. You can also edit Broadcasts for individual Campaigns in a Broadcast through the Broadcast List window, available by clicking on the List Campaigns Button.
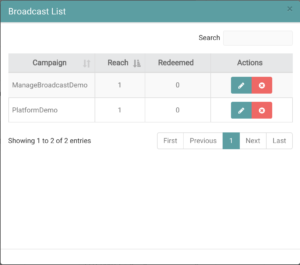
- List Campaigns: Often times, Broadcasts can be associated to more than one Campaign. To view which Campaigns a Broadcast is going to be sent to, click on the List Campaigns Button. The List Campaigns Button also shows you valuable information after a Broadcast has gone out, including the number of redemptions for a Reach offer, which is broken down by the Campaigns that the Broadcast was sent to.
- Cancel Broadcast: In the event that you have scheduled a Broadcast that you would not like to send after all, clicking on the Cancel Broadcast Button allows you to schedule a Broadcast, preventing it from going out to your subscribers.


How to use the Export Function:
In the event that you would like a CSV with the information that is being displayed, all you have to do is scroll down to the bottom of the page and click on the Export Button. The Export that you receive will contain the same information on the page, so in the event you need to have a list of Broadcasts readily available to share, you are able to easily obtain that list through the platform.
